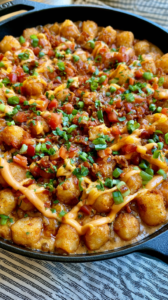
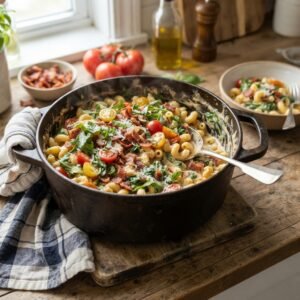
One-Pot Chicken Alfredo serves as a creamy, comforting meal that combines tender chicken and pasta into one efficient dish. This method eliminates extra cleanup by cooking your protein and noodles together in a single vessel. You achieve professional results with minimal effort while maintaining authentic Italian-inspired flavors. This recipe delivers a rich texture that satisfies any craving for a hearty weeknight dinner.
Recipe Overview
| Prep Time | 10 minutes |
|---|---|
| Cook Time | 20 minutes |
| Total Time | 30 minutes |
| Servings | 4 servings |
| Difficulty | Easy |
| Cuisine | Italian-American |
Why This Recipe Works
This streamlined approach works because the pasta releases starch directly into the sauce as it cooks. This natural starch creates a silky, thick consistency that clings perfectly to every strand of noodles without the need for flour thickeners. By browning the chicken first, you develop a deep fond in the pot that builds the flavor foundation for the entire meal.
Experience tells me that one-pot meals offer a significant advantage for busy families or home cooks looking to minimize dishwashing. You avoid the clutter of multiple colanders and pots while maintaining control over the final texture of the sauce. The chicken remains juicy because it finishes cooking in the residual heat of the creamy sauce, preventing the rubbery texture common in quick-cooked proteins.
Ingredients
| Ingredient | Quantity | Notes |
|---|---|---|
| Chicken Breast | 1 lb | Cut into bite-sized pieces |
| Pasta | 8 oz | Fettuccine or penne |
| Olive Oil | 1 tbsp | Extra virgin preferred |
| Heavy Cream | 1 cup | Full fat for thickness |
| Parmesan Cheese | 1/2 cup | Freshly grated |
| Salt and Pepper | To taste | Sea salt and cracked black pepper |
Step-by-Step Instructions
Searing the Chicken
- Heat the olive oil in a large deep skillet or Dutch oven over medium-high heat.
- Add the chicken breast pieces to the hot pan in a single layer.
- Season the chicken generously with salt and pepper to ensure deep flavor penetration.
- Sear the chicken for five minutes until golden brown on all sides.
- Remove the chicken from the pot and set it aside on a plate.
Simmering the Pasta
- Pour water or low-sodium chicken broth into the same pot to deglaze the surface.
- Add the pasta to the simmering liquid, ensuring it is fully submerged.
- Cook the pasta until it reaches al dente, which typically takes nine minutes.
- Stir the pasta frequently to prevent sticking to the bottom of the pot.
Creating the Sauce
- Reduce the heat to low once the liquid reduces by three-quarters.
- Stir in the heavy cream and allow it to heat through for one minute.
- Return the cooked chicken and any accumulated juices to the pot.
- Fold in the grated Parmesan cheese until the sauce becomes smooth and glossy.
- Adjust the final seasoning with extra salt and pepper before serving.
Chef Tips for Perfect Results
- Grate your own Parmesan cheese directly from a block to ensure it melts smoothly into the sauce.
- Cook the pasta in broth instead of water to infuse more depth of flavor into the noodles.
- Add a splash of pasta water if the sauce becomes too thick during the final mixing stage.
- Keep the heat low when adding the cream to prevent the dairy from curdling or breaking.
- Let the finished dish rest for two minutes off the heat so the sauce can settle.
Common Mistakes to Avoid
- Overcooking the pasta: This leads to mushy noodles that lose their structure when tossed in cream.
- Using pre-grated cheese: Anti-caking agents in bagged cheese prevent the sauce from becoming creamy and emulsified.
- Crowding the pan: Placing too much chicken in the pan at once causes steaming instead of searing.
- Adding dairy too early: High heat causes the cream to separate, resulting in an oily and thin sauce.
Variations and Substitutions
| Ingredient | Substitution | Impact on Flavor |
|---|---|---|
| Heavy Cream | Half and Half | Lighter texture, less rich finish |
| Chicken Breast | Shrimp | Delicate flavor and faster cook time |
| Parmesan | Pecorino Romano | Saltier and sharper profile |
Serving Suggestions and Pairings
Pair this dish with a side of roasted garlic broccoli or a fresh garden salad to cut through the richness. It serves perfectly for a celebratory dinner at home or a quick weeknight meal. Crusty artisan bread helps clean the plate of any remaining creamy sauce.
Storage and Reheating
| Method | Duration | Instructions |
|---|---|---|
| Refrigerator | 3 Days | Store in an airtight container |
| Stovetop Reheat | 5 Minutes | Add a splash of milk to loosen the sauce |
Nutritional Information
Approximate values per serving:
| Nutrient | Amount |
|---|---|
| Calories | 450 kcal |
| Protein | 32g |
| Fat | 22g |
| Carbohydrates | 35g |
Frequently Asked Questions
Can I use a different type of pasta?
You can use any short or long pasta shape like penne or linguine with this recipe. Ensure the cooking time is adjusted based on the specific noodle thickness you choose.
How do I fix a broken sauce?
A broken sauce happens when the cheese separates from the cream due to high heat. Add one tablespoon of room-temperature heavy cream and whisk vigorously until the emulsion returns.
Is it possible to make this ahead of time?
This dish is best served immediately because the pasta continues to absorb the cream as it sits. Reheat carefully on the stove with a splash of liquid if you must prepare it in advance.
How do I know the chicken is fully cooked?
The chicken reaches safety when an internal thermometer reads 165 degrees Fahrenheit. It should appear white throughout without any pink sections in the center of the meat.
Can I add vegetables to this pot?
You can add broccoli florets or sliced mushrooms during the last three minutes of the pasta cooking process. This maintains the one-pot integrity while increasing the nutritional profile of your meal.
Mastering this simple technique ensures you have a reliable, restaurant-quality dinner available whenever you need it. By focusing on fresh ingredients and proper heat control, you elevate a basic meal into a culinary success. Enjoy the creamy, savory satisfaction of homemade pasta at your own table today.
PrintOne-Pot Chicken Alfredo
Experience the ultimate comfort in a single pot with this creamy, rich Chicken Alfredo. By cooking the pasta directly in the sauce, the natural starches create a perfectly silky texture that coats every bite. This efficient recipe saves time on cleanup while delivering authentic Italian-inspired flavors. Tender chicken breast is seared to perfection before being simmered in a decadent cream and Parmesan sauce, making it the ideal hearty weeknight dinner for busy families.
- Prep Time: 10
- Cook Time: 20
- Total Time: 30
- Yield: 4 servings
- Category: Dinner
- Method: Stovetop
- Cuisine: Italian-American
- Diet: Halal
Ingredients
1 lb chicken breast, cut into bite-sized pieces
8 oz fettuccine or penne pasta
1 tbsp extra virgin olive oil
1 cup heavy cream
1/2 cup freshly grated Parmesan cheese
2 cups chicken broth (low-sodium)
Salt and cracked black pepper to taste
Optional: fresh parsley for garnish
Instructions
Heat the olive oil in a large deep skillet or Dutch oven over medium-high heat.
Season the chicken pieces generously with salt and pepper.
Sear the chicken for five minutes until golden brown on all sides.
Remove the chicken from the pot and set aside on a plate.
Pour the chicken broth into the same pot to deglaze the surface, scraping up any browned bits.
Add the pasta to the simmering liquid, ensuring it is fully submerged.
Cook the pasta until al dente, stirring frequently to prevent sticking.
Reduce the heat to low and stir in the heavy cream and grated Parmesan cheese until the sauce thickens.
Return the chicken to the pot and toss to coat until everything is heated through.
Serve immediately while warm.
Notes
Ensure you stir the pasta frequently while it simmers to release the starch for the best sauce consistency. If the sauce becomes too thick, add a small splash of water or broth to reach your desired texture. Store leftovers in an airtight container in the refrigerator for up to 3 days.