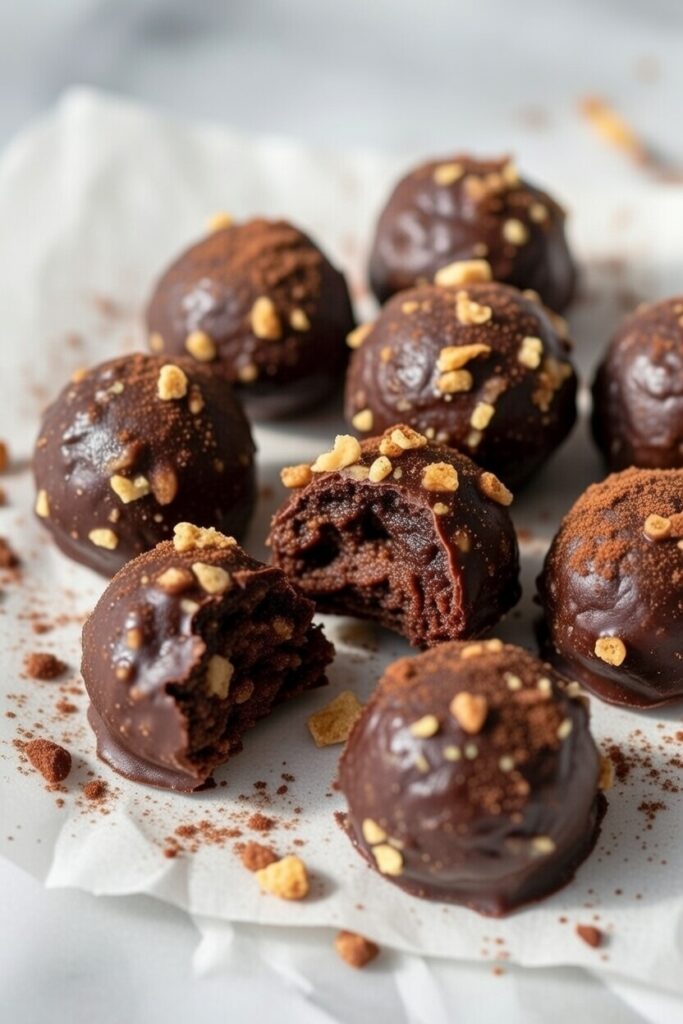
Fuel your day with these No-Bake Chocolate Peanut Butter Energy Bites. A healthy, protein-packed snack made with oats, honey, and dark chocolate.
1. Introduction
Traditionally, we might reach for a processed granola bar, but there is a more elegant homemade solution: the No-Bake Chocolate Peanut Butter Energy Bites. These No-Bake Chocolate Peanut Butter Energy Bites are a nod to the classic American “Buckeye” candy, reinvented for the health-conscious kitchen as a high-performance fuel cell
The concept of “energy balls” or “power bites” emerged from the raw food movements of the early 2000s, gaining massive popularity among marathon runners and hikers who needed portable, calorie-dense nutrition that wouldn’t melt or crumble. However, this specific combination—chocolate and peanut butter—is a nod to the classic American “Buckeye” candy, reinvented for the health-conscious kitchen.
What makes these bites unique is their structural integrity and nutritional profile. Unlike baked cookies, these rely on the natural binding properties of honey and the healthy fats in peanut butter. They require no oven time, meaning the delicate micronutrients in the raw honey and flaxseeds remain intact. Whether you are fueling a morning workout, packing a school lunch, or simply looking for a guilt-free dessert, these bites are a testament to the fact that “fast food” can actually be good for you.
2. Recipe Overview
- Cuisine Type: American / Healthy Snack
- Difficulty Level: Very Easy (Kid-friendly)
- Prep Time: 15 minutes
- Chilling Time: 30 minutes
- Total Time: 45 minutes
- Dietary Classifications: Vegetarian, Can be Gluten-Free (use certified oats), Can be Vegan (use maple syrup).
3. Equipment and Tools
While this is a “no-bake” recipe, having the right assembly line ensures a consistent texture for your No-Bake Chocolate Peanut Butter Energy Bites. A small cookie scoop is the “secret weapon” for making professional-looking, uniform No-Bake Chocolate Peanut Butter Energy Bites every single time.
- Large Mixing Bowl: A glass or stainless steel bowl with at least a 3-quart capacity to allow for vigorous stirring without spilling.
- Silicone Spatula: Essential for scraping the sticky peanut butter and honey mixture from the sides of the bowl.
- Small Cookie Scoop (1-tablespoon size): This is the “secret weapon” for professional-looking, uniform bites.
- Baking Sheet: Used as a flat surface to hold the bites while they set in the refrigerator.
- Parchment Paper or Silicone Mat: To prevent the bites from sticking to the tray during the chilling phase.
- Air-Tight Glass Jar: For final storage.
4. Serving Suggestions
These bites are versatile enough for a gym bag or a brunch spread.
- Plating: Arrange them in a pyramid on a white ceramic platter for a clean, modern look.
- Garnish: Dust lightly with a pinch of flaky sea salt (Maldon) to enhance the chocolate profile, or roll them in toasted shredded coconut for added texture.
- Complementary Sides: Pair with sliced green apples for a tart contrast or a handful of raw almonds.
- Beverage Pairings: * Hot: A dark roast pour-over coffee or an Oat Milk Latte.
- Cold: A glass of cold unsweetened almond milk or a vanilla protein shake.
5. Nutritional Information
(Per 1-ounce bite; approx. 18-20 per batch)
| Nutrient | Amount |
| Calories | 120 kcal |
| Total Fat | 7g |
| Saturated Fat | 2g |
| Protein | 4g |
| Fiber | 3g |
| Net Carbs | 9g |
Health Benefits:
- Slow-Release Energy: The complex carbohydrates in oats provide a steady glucose release, avoiding the “sugar crash” associated with candy.
- Heart-Healthy Fats: Peanut butter provides monounsaturated fats that support cardiovascular health.
- Brain Fuel: Dark chocolate contains flavonoids that improve blood flow to the brain.
6. Storage and Reheating
Since these contain no preservatives, proper storage is vital to maintain their “chew.”
- Refrigeration: Store in an airtight container for up to 2 weeks. They are best served slightly chilled.
- Freezing: These are incredibly freezer-friendly. Freeze in a single layer on a tray first, then transfer to a freezer bag. They will last 3 months.
- Reheating: Not applicable. However, if they become too firm in the freezer, let them sit at room temperature for 5 minutes before eating.
7. Expert Tips and Variations
Professional Chef Tips
- The “Wait” Period: Before rolling your No-Bake Chocolate Peanut Butter Energy Bites, let the mixture sit for 5 minutes. This allows the oats to absorb moisture, making the No-Bake Chocolate Peanut Butter Energy Bites much easier to handle without the dough sticking to your hands.
- Wet Your Hands: If the mixture is sticking to your palms, lightly dampen your hands with water or a tiny bit of coconut oil.
Creative Variations
- The “Nut-Free” Version: Swap peanut butter for Sunflower Seed Butter (SunButter).
- The “Superfood” Boost: Add a tablespoon of Maca powder or Collagen peptides for extra functional benefits.
- Seasonal Twist: In Autumn, add 1/2 tsp of pumpkin pie spice; in Winter, add a drop of peppermint extract.
8. Ingredients Section
The Foundation
- Old Fashioned Rolled Oats: 2 cups (180g). Avoid instant oats as they lack the necessary structure.
- Creamy Peanut Butter: 1 cup (250g). Use “natural” drip-style for the best binding.
The Sweeteners & Flavor
- Raw Honey: 1/2 cup (170g). Can substitute with Pure Maple Syrup for a vegan version.
- Dark Chocolate Chips: 1/2 cup (90g). Mini-chips work best for even distribution.
- Pure Vanilla Extract: 1 tsp.
The Nutritional Add-ins
- Ground Flaxseeds: 1/2 cup (60g). Adds Omega-3 fatty acids and acts as a binder.
- Chia Seeds: 2 tbsp. Adds a delightful “crunch.”
- Kosher Salt: A pinch (crucial to balance the sweetness).

9. Step-by-Step Instructions
- Combine Dry Ingredients: In your large mixing bowl, whisk together the oats, ground flaxseeds, chia seeds, and salt. Ensure the flax is evenly distributed so you don’t get “clumps” of seeds.
- Incorporate the Bind: Pour the peanut butter, honey, and vanilla extract over the dry mixture.
- The Folding Technique: Using a heavy-duty spatula, use a “fold and press” motion. Fold the dry ingredients over the wet, then press down to force the peanut butter into the crevices of the oats.
- Add the Chocolate: Once the dough is cohesive, gently fold in the chocolate chips. (If the mixture is still warm from natural peanut butter, wait a minute so the chips don’t melt).
- The Resting Phase: Place the bowl in the refrigerator for 10–15 minutes. This “sets” the fats in the No-Bake Chocolate Peanut Butter Energy Bites to make portioning effortless.
- Portioning: Using your cookie scoop, scoop out leveled portions.
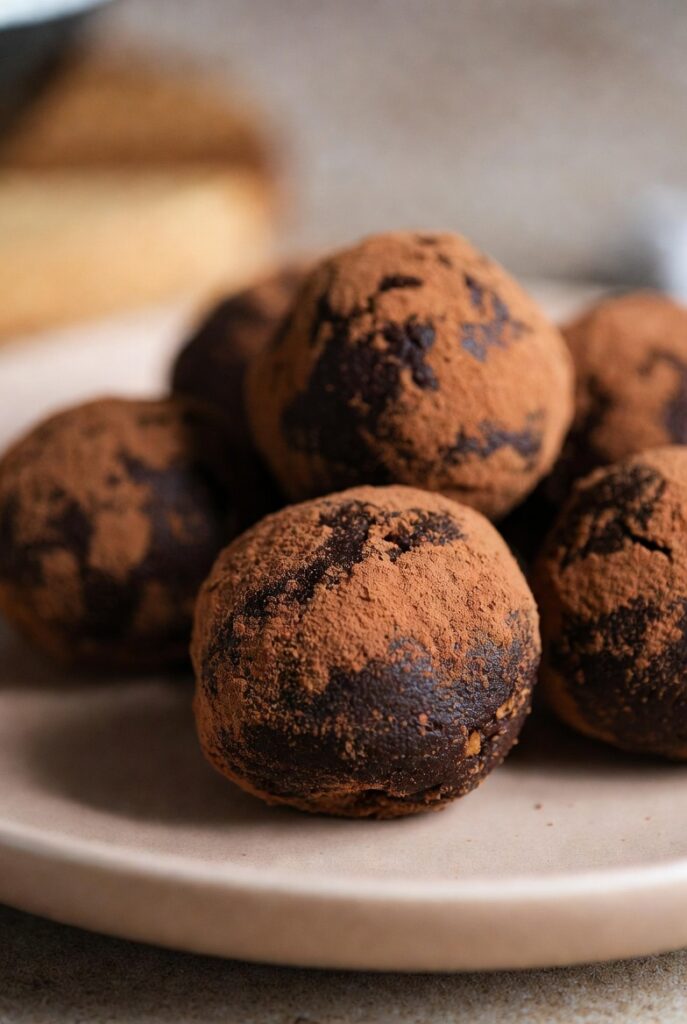
- The Roll: Roll each portion between your palms to form a smooth, 1-inch sphere.
- Final Set: Chill the finished No-Bake Chocolate Peanut Butter Energy Bites for at least 30 minutes before transferring them to an air-tight glass jar for storage.
10. Frequently Asked Questions (FAQ)
Q: My mixture is too crumbly and won’t stay in a ball. What do I do?
A: This usually happens if the peanut butter was too dry (the bottom of the jar). Add 1-2 tablespoons of extra honey or a teaspoon of melted coconut oil until it holds together.
Q: Can I use Steel Cut Oats?
A: No. Steel cut oats are too hard and require cooking. Stick to Rolled (Old Fashioned) or Quick Oats in a pinch.
Q: Are these safe for school lunches?
A: Only if the school is not nut-free. If they are nut-free, use Sunflower Seed Butter as a safe alternative.
Q: How do I make these lower in sugar?
A: Use sugar-free chocolate chips (sweetened with stevia) and reduce the honey, though you may need to add a bit of water or almond butter to compensate for the lost liquid.
Q: Can I add protein powder?
A: Yes! You can add 1/4 cup of protein powder, but you will likely need to increase the peanut butter or honey by 2-3 tablespoons to prevent the bites from becoming too chalky.