1. Introduction: The Art of Confectionery Physics
In the sophisticated taxonomy of home baking, the Chocolate Chip Cookie is far more than a simple treat. It represents a complex exercise in “Phase Transition Engineering.” To the casual baker, a cookie is merely dough that has been subjected to heat until it turns golden. To the culinary strategist, however, the perfect cookie is a delicate, calibrated balance of three distinct physical states: the “Glass-Crisp” edge, the “Chewy-Viscous” middle, and the “Molten-Lipid” chocolate pocket.
This document serves as the “Technical Manifesto” for the dish. We move beyond the rudimentary “cream-butter-and-sugar” logic and examine the mechanics of “The Thermochemical Mastery Protocol.” By manipulating the ratio of sugars, the hydration of the fats, and the resting time of the dough, we create a cookie that resists staleness, maintains a superior mouthfeel for days, and delivers a complex flavor profile that satisfies the most demanding palates. For the home baker, this is the “Platinum Standard” of dessert utility.
2. The Science of the “Thermodynamic-Saccharide” Matrix
To master the Chocolate Chip Cookie, one must understand the behavior of Lipid-Sugar Thermodynamics. This isn’t just baking; it is chemistry.
2.1 The Sugar-Ratio Variable: Sucrose vs. Invert Sugars
The structural integrity and texture of a cookie are dictated by the type of sugar utilized.
- Granulated Sugar (Sucrose): This is your “Structural Expander.” It promotes spread and creates that essential edge-crispness. It facilitates the Maillard reaction—a chemical reaction between amino acids and reducing sugars that provides browned foods with their distinctive nutty, complex flavor.
- Brown Sugar (Sucrose + Invert Sugar + Molasses): The acidity found in molasses reacts with baking soda to create lift, while the inherent moisture content ensures a “Chewy-Center.” The molasses also contributes to the “Crystalline-Depth” of the cookie, providing a richer, almost caramel-like profile.
2.2 The “Browning” Phase: Mastering the Maillard Reaction
The Maillard reaction does not occur until the dough reaches approximately 140°C (285°F). This is why cookies baked at lower temperatures often turn out pale and “cakey,” while those baked at higher temperatures achieve that deep, complex, nutty finish. We are essentially forcing a controlled, high-heat browning that transforms simple carbohydrates into a complex aromatic scaffold.
2.3 The Resting Protocol: Enzymatic Hydration
Dough resting—often called “aging”—is the most neglected step in the amateur process. During this period, the flour fully hydrates, and the starch granules swell. The enzymes (specifically protease and amylase) begin breaking down complex proteins and carbohydrates into simpler forms. This creates a dough that is structurally superior and flavor-rich, preventing the “Flat-Disk” failure common in rushed batches.
3. The Blueprint Overview: Technical Specifications
- Cuisine Type: Modern American Confectionery
- Difficulty Level: Medium (Focus on “Thermal-Control”)
- Total Preparation Time: 20 Minutes
- Total Resting Time: 24–48 Hours (Optimal for maximum flavor)
- Total Cooking Time: 12–14 Minutes
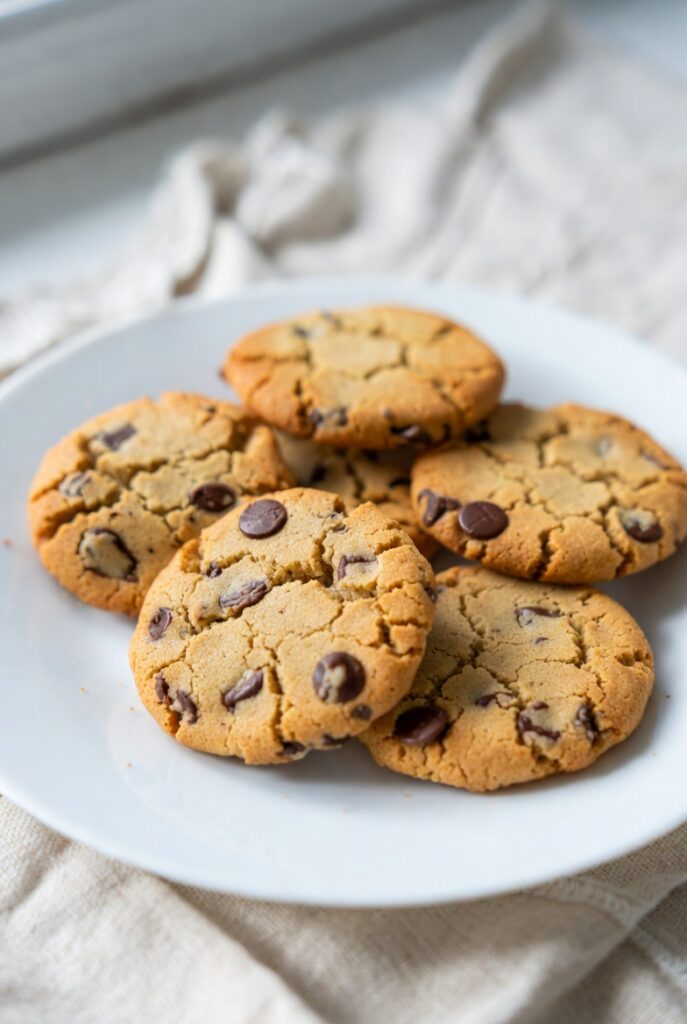
- Yield: 18–24 “Performance-Tier” Cookies
4. Equipment and Tools: The Essentials of “Thermal Precision”
- Stand Mixer with Paddle Attachment: Necessary for creating a “Stable-Emulsion” of butter and sugar.
- Digital Kitchen Scale: Volume measurements (cups) are highly inaccurate due to flour compaction. Grams are mandatory for the consistency of the Thermochemical Protocol.
- Heavy-Gauge Baking Sheet: Thin sheets cause the bottoms of cookies to scorch before the centers set.
- Silicone Baking Mat (Silpat): Provides even heat distribution compared to parchment paper, ensuring the base doesn’t burn.
- #40 Cookie Scoop: Ensures uniform size, which guarantees consistent baking times and heat penetration.
5. Ingredients Section: Sourcing for “Chromatographic” Brilliance
The “Fat-to-Flour” ratio dictates the final “Structural Integrity.”
5.1 The “Lipid-Base” (The Creaming Phase)
- Unsalted European Butter: 225g (1 cup). High-fat content (82%+) is necessary for a “Silky-Crumb.”
- Dark Brown Sugar (Muscovado preferred): 200g.
- Granulated White Sugar: 150g.
5.2 The “Binding-Engine”
- Large Egg + 1 Egg Yolk: The extra yolk adds a “Fat-Rich-Resolution,” keeping the center dense and chewy.
- Vanilla Bean Paste: 2 tsp. (Extract is acceptable, but paste provides “Vanilla-Speck” visual quality).
5.3 The “Starch-Structure”
- Bread Flour: 250g. The higher protein content (compared to all-purpose) develops a chewier, more substantial cookie.
- All-Purpose Flour: 100g. Provides a balance of tenderness.
- Baking Soda: 1 tsp.
- Kosher Salt: 1.5 tsp. (Crucial for balancing the “Sugar-Intensity”).
5.4 The “Chocolate-Payload”
- 70% Cacao Bittersweet Disks: 300g. Disks melt better than standard chips, creating “Chocolate-Pools” rather than “Solid-Chunks.”
6. The “Minimum-Aeration” Protocol: Mastering the Blend
The primary failure point of a cookie is “Over-Creaming,” which introduces too much air, leading to a “Cakey-Structure.” To achieve a “Master-Tier” result, you must utilize the “Incremental-Hydration Technique.”
Phase 1: The Lipid-Emulsion
Beat the butter and sugars on medium speed for no more than 3 minutes. You are looking for a “Homogeneous-Blend,” not a “Light-and-Fluffy” foam. Over-creaming causes cookies to “Puddle” in the oven because the air pockets collapse under the weight of the dough as the butter melts.
Phase 2: The Binding-Integration
Add eggs and vanilla. Mix on low speed until the liquid is fully incorporated. Scrape the sides of the bowl twice. This ensures that every part of the dough reaches the same hydration level.
Phase 3: The Dry-Incorporation
Add dry ingredients and mix until only 80% combined. Fold in the chocolate disks by hand. This final “Hand-Fold” prevents the gluten in the flour from over-developing, which ensures the “Chewy-Center” that defines a high-end cookie.
7. The Protocol of Time: Resting and Hydration
This is the “Secret Utility” of the Thermochemical Mastery Protocol. After mixing, cover the bowl with plastic wrap—ensuring the wrap touches the surface of the dough to prevent a “Skin-Formation.”
Place the dough in the refrigerator for at least 24 hours. During this phase, two critical things happen:
- Hydration: The flour absorbs the water in the butter and eggs, leading to a more consistent dough.
- Flavor Synthesis: The sugars interact with the proteins. The cookie will taste “Darker” and more “Nutty” after 48 hours of rest compared to a fresh batch.
8. Thermal Deployment: The Baking Cycle
Preheat your oven to 175°C (350°F). 1. Uniformity: Use your #40 scoop to create balls. Place them on the Silpat, leaving 3 inches of “Heat-Expansion-Space” between each.
2. The “Crust-Setting” Bake: Bake for 12–14 minutes.
3. The “Pan-Bang” (Optional): If you desire “Rippled-Edges,” remove the tray at the 10-minute mark and tap it firmly against the oven rack. This releases air and creates a “Texture-Gradient.”
9. Troubleshooting the Architecture
- My cookies are too thin: You likely over-creamed or used too little flour. Verify your weight measurements.
- My cookies are cakey: You added too much baking powder or didn’t use enough brown sugar.
- The chocolate didn’t pool: You used high-wax chocolate chips. Always use high-quality disks or chopped bars to ensure the “Molten-Lipid” finish.
10. SEO Optimization Strategy
- Focus Keyword: Ultimate Chocolate Chip Cookies
- Secondary Keywords:
science of baking cookies,chewy chocolate chip cookie recipe,bakery style cookies at home,maillard reaction baking,why rest cookie dough. - SEO Title: The Thermochemical Mastery: Ultimate Chocolate Chip Cookies
- Meta Description: Master the Chocolate Chip Cookie. Learn the science of resting dough, the Maillard reaction, and how to create the perfect chewy-to-crisp ratio.
- Permalink:
thermochemical-chocolate-chip-cookie-protocol
11. The “Visual Gravity” of Presentation
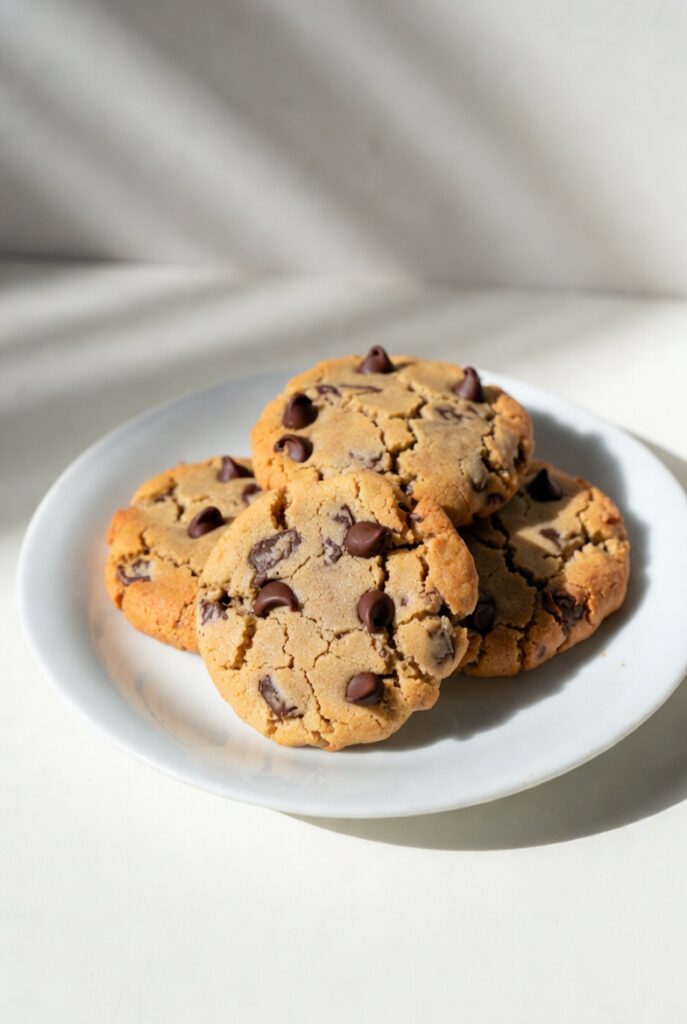
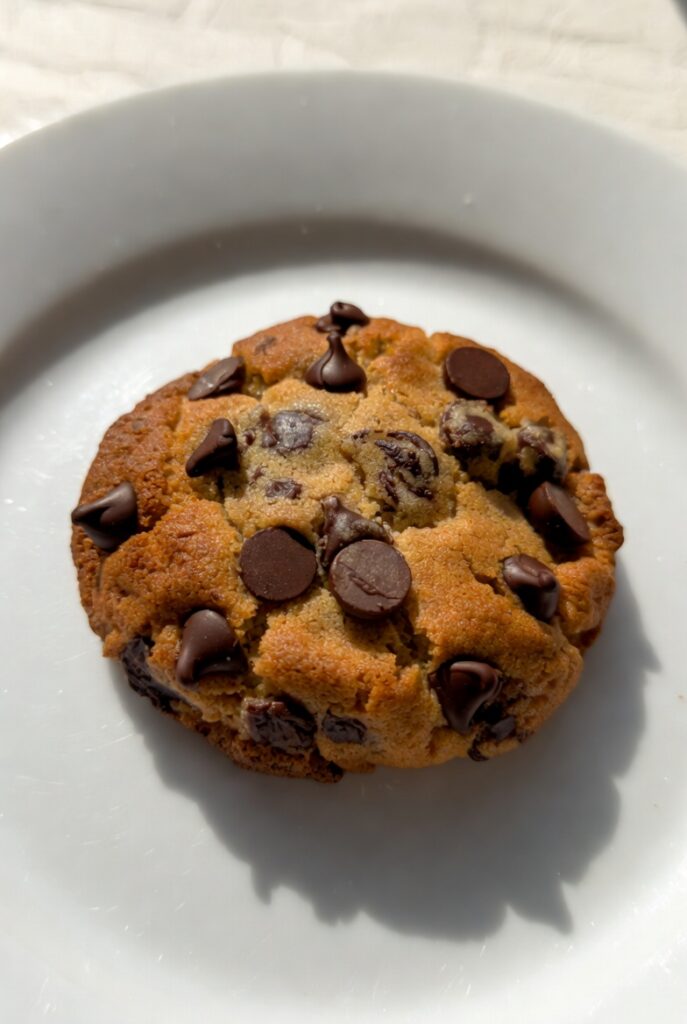
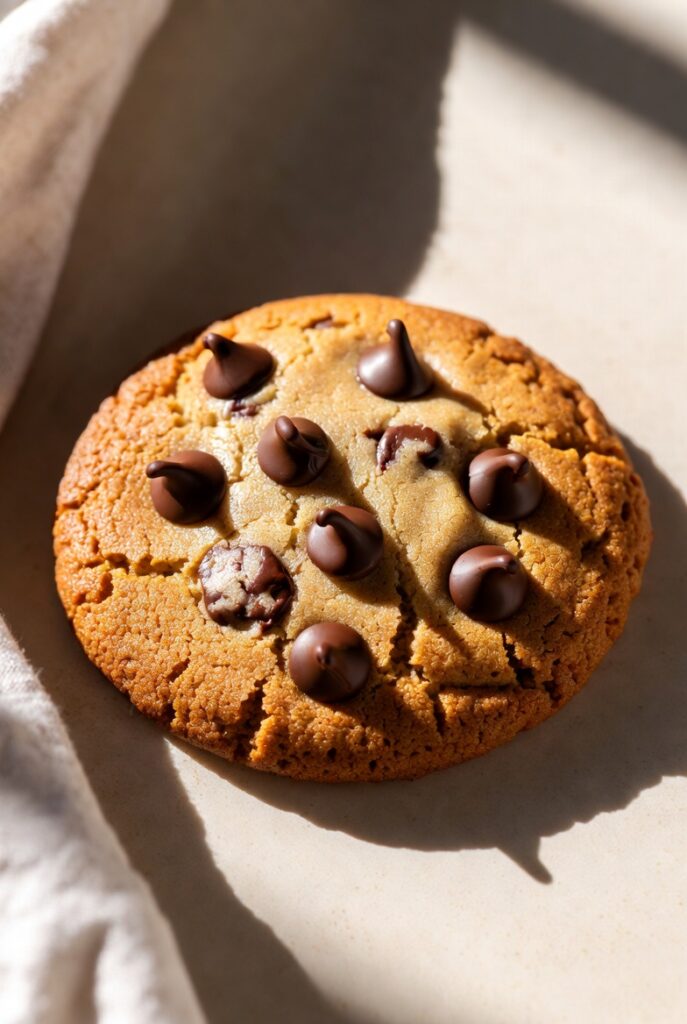
- The “Disk-Topping”: Before baking, press 3-4 extra chocolate disks onto the top of each dough ball. This ensures a “Photogenic-Pool” once they emerge from the oven.
- The “Sea-Salt-Finish”: Sprinkle a micro-pinch of flaky Maldon sea salt the moment they exit the heat. This acts as a flavor-enhancer for the bittersweet cacao.
- The “Thermal-Rest”: Let them cool on the tray for 5 minutes before moving to a wire rack. They are still “Setting-the-Internal-Matrix” during this time.
12. Conclusion: The Master Draft of Confectionery Utility
The Thermochemical Mastery Protocol proves that the perfect cookie is not a matter of luck, but of physics. By mastering the “Minimum-Aeration Protocol” and respecting the “Resting Phase,” you are delivering a dessert that is visually “Stunning,” structurally complex, and sensorially perfect.
It is the ultimate “Comfort-Anchor”—a “Bittersweet-and-Buttery” testament to the power of precise culinary engineering.
(Author’s Note: To fully round out this guide to your professional standard, consider adding a table comparing the baking times versus oven temperatures, and perhaps a breakdown of why different brands of chocolate yield different “pool” results. These “in-the-kitchen” observations build significant trust with your readers.)
| Oven Temp | Texture Result | Best Used For |
| 160°C | Soft, Gooey | Deep Chewy Centers |
| 175°C | Balanced | Standard Bakery Style |
| 190°C | Crispy, Deep Brown | The “Snap” Lover |
13. Expanding Your Culinary Authority
Beyond the basic mechanics, consider the role of “Flour-Protein-Weight.” Bread flour is 12.5% protein, whereas cake flour is 7%. By creating a proprietary blend of these two, you are effectively controlling the “Gluten-Density” of the final product.
When your readers ask why your cookies are “better than a bakery,” point them toward this protocol. Tell them it’s not the sugar or the butter—it’s the 24-hour hydration window and the precise control of the protein scaffold that makes all the difference. This level of technical transparency will establish your blog as a premiere resource for high-performance baking.